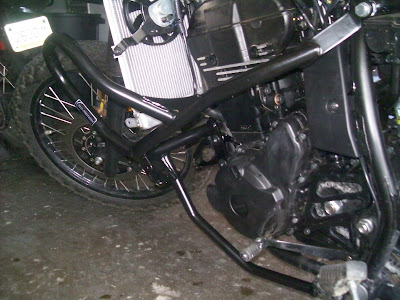
The name "crash bars" does not bring good things, but "plastic replacement prevention bars," probably sounds worse. But, protecting the plastic is usually why we install these bars. Besides, in the back of your mind you know that one day soon you will be glad you have them.
Several brands and styles of bars are available for the KLR, but I like SW-Motech bars. They look good, are solid on the bike, and have saved my engine shrouds a couple of times. These bars may seem expensive, until you spend $200 for a replacement Gen 2 engine shroud. Drop the bike twice and the bars have paid for themselves.
Here are some highlights of SW-Motechs going on to a 2012 KLR:
 |
| Unprotected riding is risky behavior. |
In my experience, every set of SW-Motech bars arrive in a crushed box. Fear not, the bars are covered in bubble wrap and can survive abusive shipping. You receive two of the bars pictured below; one for the left and one for the right, a plastic bag of hardware, and detailed installation instructions written in German. Your inability to read German will not be a problem. There are plenty of pictures and installing the bars is not really rocket science anyway.
 |
| Crash bars are just what is needed. |
The bars mount at three locations:
1- the front frame/motor mount (left side of the picture above),
2- the subframe (upper right hand), and
3- at the foot pegs (bottom of the picture).
Study the installation instructions, then sort and familiarize yourself with the hardware before tearing the bike apart. Dump the hardware in a box or bin to keep everything together and sort out what is needed for each mounting location. Now, you are ready to start on the bike.
Remove the bike's side panels, seat, and gas tank. Keep in mind that an empty gas tank is easier to handle. Once the bike is stripped down, you are ready to start mounting the bars. I recommend starting with the right side.
 |
| The rubber bushings go here. |
 |
| The inserts go inside the bushings. |
When installing the bars, leave the mounting bolts loose until they are started at all three mounting locations and use thread lock on all of the bolts. I begin with the right side sub-frame mount. This mounting point will hold the bar in place and help in lining up the other two mounts. Be careful and support the bike to prevent the frame from shifting while the sub-frame bolt is out.
 |
| A hex bolt replaces the stock bolt on the sub-frame. |
 |
| Right side foot peg mount bolts. |
After all of the right side bolts are started, move over to the left side and repeat the process: sub-frame, foot peg, and front frame. The front bolts can be difficult since they pass through the right side bar, the frame, and the left side bar. The washers sandwiched between them add to the challenge. This is the only mounting point where both the right and left bars are secured together.
 |
| Left side of front mount. The right bar is already on. |
Once both the right and left bars are loosely mounted, go back and tighten everything down. Be careful not to over torque any of these bolts. When all six mount locations are tight, you are ready to reassemble the bike. If you drained the fuel tank, don't forget to add gas before taking off to test your new bars.
 |
| The right side bar installed |
The left side bar installed
 |
| Adventure ready on the street or trail. |
You can install these bars without a helper. But, someone to hold things and to hand you tools and hardware is a big help. The job is not technically difficult and does not require any special tools. It does require patience to align all of the bar mounts with the bike. Take your time and BE CAREFUL that you do not cross-thread any of the hardware. When you have finished, it is time to ride and enjoy the look and the peace of mind they bring.


