Shaun Murray is back with Park 2 of his excellent balancer chain video. When changing the doohickey did not solve his problem, this rider looked deeper into the balancer chain assembly and found more problems. This video shows you why changing the doohickey is not a "cure all" for lack of tension in your balancer chain. Credit for this video goes to You Tube Shaun Murray - well done, mate!

Riding the Kawasaki KLR 650 on and off road.
BEWARE - Kawasaki KLR 650: Another Doohickey Video. Part 1
Before you simply replace the doohicky and spring, take a look at this video. It is a good idea to do a proper inspection of the balancer chain assembly while you have the engine opened. Credit for this video goes to You Tuber Shaun Murray.


NTSB Report on Deadly New Hampshire Crash
A pickup driver's impairment by drugs was the probable cause of truck/motorcycle accident resulting in multiple rider fatalities. The June 2019 tragedy occurred when a pickup crashed into a group of 18 riders from the Jarhead Motorcycle Club. The tragedy near the small town of Randolph, NH resulted in the deaths of seven riders.

The pickup driven by Volodymyr Zhukovskyy, 24, of West Springfield, Mass., crossed the yellow line of a rural highway and plowed into the group of riders. The December 2020, National Transportation Safety Board report revealed that Zhukovskyy had cocaine and fentanyl in his system and this was the probable cause of the catastrophe. Prior to the accident, Zhukovskyy had a history of drug and DUI related crashes in Texas and Ohio.

He has been charged with reckless manslaughter, negligent homicide and negligent homicide/DUI, and single felony counts of aggravated driving while under the influence of intoxicating liquor or drugs and reckless conduct. He pleaded not guilty.
A report by the Federal Motor Carrier Safety Administration revealed multiple violations of federal regulations by Zhukvoskyy's employer.
GoPro Hero 8 Black First Ride
I recently picked up a GoPro Hero 8 camera and here is my first ride video. Nothing too crazy, just a ride around town to test the camera and see how I like it.
First impression of the Hero 8 was good, but there are a few things that make you wonder, why did GoPro do that to the camera? Other features are pretty great, some things that certainly could be better. I will be posting more on the camera soon. Enjoy watching the first Hero 8 ride.
First impression of the Hero 8 was good, but there are a few things that make you wonder, why did GoPro do that to the camera? Other features are pretty great, some things that certainly could be better. I will be posting more on the camera soon. Enjoy watching the first Hero 8 ride.
Wire Harness Issues

The bike was running perfectly when in a turn it died. Nothing worked, no lights, no horn, nothing. After getting soaked in a storm and nearly eaten alive by mosquitoes, I found the main fuse had blown. I replaced it and turned the key. The fuse blew immediately.

This is looking forward on the RH side of the bike, with side panel off

Before heading out for summer adventure, take some time and inspect your bike's wiring. This would also be a good time to armor your wire harness. I used plastic cable sleeve and it has worked well. When that's done, pack the appropriate size fuses, a roll of electrical tape and find where the fuses are located on the bike. Don't let a preventable electrical issue ruining a great day of riding.
Acerbis Front Fender Review
Some say the KLR’s front fender, may be a bit too large. Others say it looks just fine. I was part of the second group until my
first highway ride in a strong crosswind. The wind caught that big fender and I had to fight the bike to stay on my side of the road. Soon after, I decided the stock fender had to go.

Swapping the fenders is easy enough. Simply remove four 8mm screws and the stock fender comes off. Don't forget to disconnect the speedo cable and remove it from the fender bracket. The
new fender will need new screw holes drilled. Take careful measurements to be sure the hole spacing and alignment is correct. Then drill the holes in the new fender and mount it.

The smaller fender gives a different look to the bike, but I like it just fine. The new fender's smaller size catches a lot less wind, which was exactly what I wanted. Now. when riding in strong wind, the KLR is much more manageable. It was a good change for the bike and I am happy with it.

There are several options from different manufacturers. I chose the Acerbis Supermoto fender. I replaced black with black so matching colors was not a concern., but these fenders are available in many colors. But, you can't go wrong with basic black.
 |

The smaller fender gives a different look to the bike, but I like it just fine. The new fender's smaller size catches a lot less wind, which was exactly what I wanted. Now. when riding in strong wind, the KLR is much more manageable. It was a good change for the bike and I am happy with it.
Last Ride During the Corona Scare
Idaho Governor Brad Little recently ordered Idahoans to stay home unless they have essential business out of the house. I carefully reviewed the Governor's list of essential reasons and sadly "motorcycle joy riding" is not on there. Perhaps this oversight will be corrected in the near future. So, I am staying home like folks in many other areas of the country.
It is a small sacrifice as I count my many blessings during this troubling time. My family and friends are all healthy and have avoided Covid-19. We are working and have toilet paper, food, and all the necessities to ride this thing out. Our prayers are for the thousands of others who have family and/or friends who are ill or are sick themselves. Not to mention the many who have lost family and friends to this virus. This is a serious and troubling time.
I made this video the night before our governor ordered everyone to stay home. It's a short ride around town and is a bit odd because there are very few cars out. Normally, these streets would be much more crowded.
I don't know when I will be riding again. The stay at home order lasts until April 15 and I am planning for that day. Meanwhile I have plenty to do around the house and will be blogging when I can. Stay safe, wash your hands, and keep your distance from others. We will get through this.
KLR 650 Air Filter Removal and Cleaning
Getting ready for spring riding, I threw together this quick how-to on removing and cleaning a dirty air filter. The side panels are already off here, but I am sure you can get them off without any trouble.
Crater Lake Drone Video
Crater Lake National Park is one of my favorite destinations. As I wrote in an earlier post, this gem of the Pacific Northwest is overflowing with natural beauty and an undercurrent of mystery. I discovered this video and felt it was worth sharing.
Here is some nice footage of a drone circling over the lake and Wizard Island with the Cascade Mountains in the distance. This is not my video, but was posted by You Tuber, Ralph der Kapitaen. While the video is nicely done, it does not equal the experience of seeing Crater Lake for yourself. I hope this gets your travel blood flowing and you start planning for summer trips!
JNS Engineering Skid Plate Review
Before tackling any serious off road riding most KLR riders replace the bike's inadequate stock skid plate with something tougher. There are several options at various prices, but when it comes to protecting the bottom of the engine, you don't want to be cheap.

JNS Engineering produces and sells parts for several different off road bikes. Their KLR skid/bash plate is a top quality part and it's made in the USA. Another plus is that it's specifically designed to fit with SW-Motech crash bars. As you see below, the KLR's stock piece of plastic is no comparison.

The JNS plate is solid, heavy duty aluminum with welded seams. It comes powder coated and gives great protection to the bottom of the bike. It easily mounted on my Gen 2 KLR with 4 bolts and fit perfectly with my crash bars. Quality parts stand the test of time and I have never regretted this upgrade.

This has been on my bike for several years and been ridden over some punishing trails. The plate has taken a beating and aside from a few scratches, it looks as good as new. The skid/bash plate is an important piece of armor to protect your engine and the JNS plate gives peace of mind to ride the roughest trails out there.
3 Summer Destinations Plus 1 Bonus
As you wait for the snow to melt and look forward to summer, take time now to plan your summer riding destinations. If you
want to avoid the lines of cars and crowds at Yellowstone, Arches, and
Yosemite National Parks, then read on. Here are three great summer
destinations for you and your bike plus one bonus. Click the name of each location to see the website for more details.
1. Valley of Fire State Park, Nevada: Just 50 miles northeast of Las Vegas, Valley of Fire is often overlooked in the glitz and glamour of Vegas. The park features amazing sandstone rock formations that come alive in the setting sun. The sights are a treat for everyone and a photographers dream.

There are also ancient Native American petroglyphs located in many areas of the park as well as two campgrounds and areas for picnicking and hiking. Another fun trivia fact: this was the film location for the climactic ending of the movie Star Trek Generations where Captain Kirk died for the last time - depending on which time line you follow.

2. Silver City. Idaho: It is a beautiful ride into southwest Idaho's Owyhee mountains and it gets better when you reach the ghost town of Silver City. During the 1880's this former mining town was home to 2,500 people, but the mines closed down in 1942 and Silver City is nearly abandoned today.


The road up to Silver City starts out as a maintained gravel, but farther up it gets rougher and less maintained. There are also amazing mountain views on this trip so bring your camera and some holy water!
3. Nine Mile Canyon,Utah: Don’t be fooled by the name, this canyon is actually 40 miles long. Located
a bit northeast of Price, Utah, Nine Mile Canyon is also an outdoor art museum. The
ancient native Fremont and Ute peoples decorated

the canyon walls with some of
the most spectacular rock art to be found in Utah. The route through the canyon
is a well maintained gravel road with some stretches of pavement making an easy
ride for the KLR.

The area is rugged, harsh and beautiful with no services after leaving Wellington, Utah. Be sure you have plenty of gas, water, and some snacks before heading to this art show.


The area is rugged, harsh and beautiful with no services after leaving Wellington, Utah. Be sure you have plenty of gas, water, and some snacks before heading to this art show.

You can easily spend a couple of hours wandering through the detailed displays of dinosaurs, skeletons, fossils, and the people who once lived in ancient Utah. This a first class facility that is often missed by people racing toward Moab. If riding the KLR to a museum sounds odd, remember you are doing it for dinosaurs!!

When A Good Hip Goes Bad
I am not sure when it started but one day I noticed pain in my left hip as my weight shifted to that leg when swinging the other leg over the bike. Sometimes while riding I would occasionally feel sharp, shooting pains from my left hip. I was pretty active running, biking, and kayaking and figured this was just another pain that would go away. It didn't, but I was not about to stop riding.

One dark winter day I slipped on a wet tile floor and landed squarely on my left hip joint. That hurt a lot and the pain changed from slightly annoying to very troublesome. Now, I had shooting hip pains while sitting and watching TV. I tried to jog, but after a few blocks of severe hip pain, I limped home feeling like a wounded animal. People started to notice that I walked with a limp. I tried to hide it but sooner or later someone would again ask, "Why are you limping?" I knew I should see a doctor, but I kept telling myself this would soon pass.

Swinging my leg over the bike became a painful chore and I groaned out loud from just getting on the bike. Standing on the pegs while riding loose gravel was very painful and jarring over rough areas was much worse. Even shifting became difficult and I twisted my body while riding to lessen the pain. This was affecting my balance and I knew something needed to be done. Despite my vehement denials, I was forced to admit the hip pain was clearly getting worse.
I decided physical therapy was the answer and went to a very good sports clinic. They quickly realized I had an arthritic hip and referred me to a bone and joint specialist. The expert, Dr. Daines saw my x-ray and confirmed osteoarthritis in my left hip. My femur bone was actually rubbing/grinding against my pelvic bone. The normal cartilage in this joint was gone.

The doctor cheerfully told me, "The good news is, a hip replacement will fix it." I was shocked and blurted, "I am too young for hip replacement." Being kind, he smiled and said, "You are...young-ish. It means you will get more use out of the new hip." He made clear I had two options, 1) hip replacement surgery or 2}a "pain management plan" involving injections and pills. I chose surgery.

My hip surgery was yesterday and everything went perfectly. Afterwords in the recovery room Dr. Daines told my hip was in worse shape than he had expected. Today I am limping behind a walker and will continue limping for the next few days. The good news is this pain is different and less severe than before. I can look forward to riding again and without the pain, in another 4-6 weeks.

Looking on the bright side, this forced break from riding will not be all bad. I have time to catch up on blogging, to clean up the old girl and take care of some delayed maintenance. When we hit the road again the KLR and I will both be in prime shape in spite of being only "young-ish."


One dark winter day I slipped on a wet tile floor and landed squarely on my left hip joint. That hurt a lot and the pain changed from slightly annoying to very troublesome. Now, I had shooting hip pains while sitting and watching TV. I tried to jog, but after a few blocks of severe hip pain, I limped home feeling like a wounded animal. People started to notice that I walked with a limp. I tried to hide it but sooner or later someone would again ask, "Why are you limping?" I knew I should see a doctor, but I kept telling myself this would soon pass.

I decided physical therapy was the answer and went to a very good sports clinic. They quickly realized I had an arthritic hip and referred me to a bone and joint specialist. The expert, Dr. Daines saw my x-ray and confirmed osteoarthritis in my left hip. My femur bone was actually rubbing/grinding against my pelvic bone. The normal cartilage in this joint was gone.

The doctor cheerfully told me, "The good news is, a hip replacement will fix it." I was shocked and blurted, "I am too young for hip replacement." Being kind, he smiled and said, "You are...young-ish. It means you will get more use out of the new hip." He made clear I had two options, 1) hip replacement surgery or 2}a "pain management plan" involving injections and pills. I chose surgery.

My hip surgery was yesterday and everything went perfectly. Afterwords in the recovery room Dr. Daines told my hip was in worse shape than he had expected. Today I am limping behind a walker and will continue limping for the next few days. The good news is this pain is different and less severe than before. I can look forward to riding again and without the pain, in another 4-6 weeks.

Looking on the bright side, this forced break from riding will not be all bad. I have time to catch up on blogging, to clean up the old girl and take care of some delayed maintenance. When we hit the road again the KLR and I will both be in prime shape in spite of being only "young-ish."

Cheap Handguards - You Get What You Pay For
One of the first mods I made on my KLR was to replace the plastic stock "wind guards" with a set of legitimate handguards. That was the plan. The problem was that I played it cheap and bought universal fit, handguards and got what I paid for.

I ordered these from Western Power Sports and no longer remember the specific brand name. That's unimportant since these are sold under several different brand names from various retailers. You can find them all over eBay for under $30.

Installing them was a real pain as it is with anything that is "universal" fit. The short story is they would not fit properly. No matter how they were positioned, they interfered with the brake and clutch levers. After several hours of bending and hammering on them with a rubber mallet, I finally added spacers and longer screws on the handlebar clamps.
This repositioned the guards so they did not block the brake or clutch levers movement. On the left side handlebar, I used a Dremel tool to cut off the metal loop cable guide. Next, I used the Dremel to grind off the remaining "nubs." Because, naturally, that was the exact spot where the handlebar clamp went. At last, with the spacers and longer screws I finished on the left side.

When everything was finally done, I was pretty unhappy and regretted not buying a better product. The handguards have been on the bike for several years and have worked fine. But I hold a grudge against them for the hours of work needed to get them installed. If you are thinking about buying a set like these, seriously think about something else.


Installing them was a real pain as it is with anything that is "universal" fit. The short story is they would not fit properly. No matter how they were positioned, they interfered with the brake and clutch levers. After several hours of bending and hammering on them with a rubber mallet, I finally added spacers and longer screws on the handlebar clamps.
 |
| Left side showing where cable guide used to be. |

When everything was finally done, I was pretty unhappy and regretted not buying a better product. The handguards have been on the bike for several years and have worked fine. But I hold a grudge against them for the hours of work needed to get them installed. If you are thinking about buying a set like these, seriously think about something else.
The Moab Diner
After a few days on the road eating energy bars and freeze dried meals from foil packets, I am ready to find a good restaurant that serves real food. When in Moab, Utah one of my favorites is the appropriately named, Moab Diner.

This is a family place located at 189 S. Main Street and is easy to find when driving through town. They serve breakfast, lunch and dinner with a variety of platters, sandwiches and full meals. There is also a kids menu.

Now, this is what I am talking about! They have the burgers, chicken, and steaks as well as some specialty items like the "Kokopelli Chicken Sandwich" and the "Green Chili Sauce Cheeseburger." It's all good, and I mean that literally.

They serve breakfast, lunch and dinner so no matter what time of day you arrive, you will find something you want. The food as well as the service has always been excellent and the prices are reasonable.


After a full day of your favorite activity in the Moab area, I recommend the Moab Diner and Ice Cream Shoppe. Try to arrive before you're starving since during the summers tourist season they often have a waiting list for a table. But it's worth the wait.

This is a family place located at 189 S. Main Street and is easy to find when driving through town. They serve breakfast, lunch and dinner with a variety of platters, sandwiches and full meals. There is also a kids menu.

Now, this is what I am talking about! They have the burgers, chicken, and steaks as well as some specialty items like the "Kokopelli Chicken Sandwich" and the "Green Chili Sauce Cheeseburger." It's all good, and I mean that literally.

They serve breakfast, lunch and dinner so no matter what time of day you arrive, you will find something you want. The food as well as the service has always been excellent and the prices are reasonable.

When you are ready for treat you can checkout the ice cream shop that serves cones, shakes, sundaes and more. When I am ready for desert I keep it simple and go for the pie!

Sena SMH10R Low Profile Bluetooth Headset and Intercom
A lot of people ask about the best Bluetooth headsets. I have been riding with the Sena SMH10R Low Profile headsets for over a year and am very happy with them. They are small and low profile on the helmet, plus they are affordable. One of their best features are the large front, center, and rear buttons that are easy to use while wearing gloves. Once you get used to using the controls, it is easy to increase/decrease volume, skip songs on the playlist or switch between functions.


The Bluetooth allows to you call hands-free on your cell phone, listen to stereo music, get instructions from a GPS device and have intercom conversations with your passenger or other motorcycle riders. Other Bluetooth functions allow multiple connections with up to 4 additional riders.

The large plus and minus buttons control volume and allow you to repeat or skip forward and backward on your favorite playlist.There is a center button as well that works in combination with the others to move through various menus for setup. These radios have several other options.
The speakers have good sound and unless your helmet is very noisy, you can jam to your favorite songs at highway speed. If you prefer earbuds, the speakers unplug from the wire harness and you can plug in the Sena earbuds which are sold separately. The radios come with a boom mic and a wire mic. I use the wire mic that Velcros to the helmet padding and is much less intrusive inside the helmet.

The SMH10R will fit various types of helmets and include a standard mounting clamp. Sena offers different types of clamps as an additional accessory (sold separately), to allow various installations and user preferences. I mounted these with heavy-duty Velcro strips and it has worked fine.

As a safety feature, these radios also have integrated voice prompts to operate functions like GPS, volume controls, mobile phone calls and more without needing to take your hands off of the handle bars. There are also multi-language voice prompts for English, French, German, Italian, and Spanish although I have never used them. These are not newest or the most expensive Sena headsets on the market, but they do a great job for me and recommend them.
Changing the Brake Pads
Changing your KLR's brake pads is a straight forward job. No great mechanical skills or special tools beyond a socket set and a metric allen wrench set are needed. This is an overview of the job, and you should consult a service manual when servicing your brakes.

Begin on the front and remove the brake hose support to allow added room to work when the caliper is removed. Next, use a 5mm allen wrench to loosen but do not remove the hex keyed alignment pins on the caliper. These can be tight and are easier to break free with the brake caliper still mounted on the fork. Use a 12mm socket to remove the two caliper mounting bolts. Also, have a length of rope or bungee handy to support the caliper once it is removed from the fork. Do not let the caliper dangle by the brake hose.

Now, the alignment pins that hold the pads in the caliper are ready to come out. Use the allen wrench to finish unscrewing them. If they are stubborn about coming out, use a suitable tool to push them out from the back side. When both pins are removed, the inside pad rotates out and the outside pad can be easily removed. That is all for taking things apart, the job is half done.

These pictures above clearly contrast the wear on the old and new pads for the front brake.

Before installing the new pads, be sure to push the two brake pistons back into the cylinder bores. This makes room for the thicker new pads to fit over the rotor when the caliper goes back on. The pistons can be moved by hand, but if they are stubborn use a C clamp to gently push them back into the caliper. Insert the first pad against the pistons then partially insert both alignment pins through the caliper and the new pad. Give these pins (below) a quick cleaning and inspection before inserting them.

There is a spring beneath the both pads so apply slight downward pressure to align the pads with the pins. With the pins through the first pad, position the remaining pad and insert the pin through it and completely into the caliper. A couple turns on the pin will hold it in place for now.
Next, position the caliper on the fork and reinstall the mount bolts. Be sure to use thread locking compound on the threads and torque them down. Apply locking compound on the exposed threads of the alignments pins and torque them down. Finally, reinstall the brake hose guide and remove the support rope from the caliper.
The rear brake pads removal and installation are identical to the front and you can follow the same process when changing them. You can see below, my rear pads had a bit less wear than the front.

Before riding the bike, be sure to pump both brakes several times to build pressure in the system. Also, check the fluid level for both the front and rear cylinders. Finally, record the mileage for a record of when the new pads were installed. If everything went well, you should be done in about an hour.
Riding A Discount Stripper
The long, dreary winter refused to gracefully melt away. Instead, the cold, wind, and snow rudely persisted well into spring. When spring break plans began to take seed, I eagerly looked forward to some fun and sun in one of my favorite getaways, Moab, Utah. My original plan was to ride down south, but a last minute snow fall the day before departure forced a change in plans. The new plan was to drive the Tacoma to southern Utah and then rent a motorcycle for some two wheeled adventures. This is what led me to the Discount Stripper.

Discount Stripper is my nickname for this 2007 Suzuki V-Strom 650. Her generally ratty condition was appropriate. She was marred, dented and scraped in several spots. The aftermarket left front turn signal and clutch lever with a broken end showed that she had been laid down a few times. The bike looked beaten up and no doubt suffered from a lot of abuse and neglect. A discount stripper indeed.

Still, I had never ridden a V-Strom and was curious to try those fuel injected twin cylinders. Would the Stripper's performance threaten my devotion to the KLR and leave me unsatisfied in the future? Riding her was the only way I would know. A careful inspection revealed the lights all worked, the chain and tires were worn, but acceptable, the engine oil was good and the brakes seemed fine.
With some apprehension I turned the key and pushed the start button. She fired right up. That two cylinder engine sounded a bit odd to me, but it idled just fine. I swung a leg over the seat and tapped the shifter to engage first gear. I gently twisted the throttle, eased off the shortened clutch lever and rolled away. "Wow, this seat is really low", I thought as I tucked my legs up and found the foot pegs.

My first impression was the engine seemed a bit "buzzy", but I blamed the vibration and poor ride to the worn Kenda tires. After getting a feel for the bike, we headed for the highway to see the sights. First was a leisurely cruise through Arches National Park. Next came a run out to Potash and back. Later we followed Highway 128 northeast along the winding Colorado River until a thunderstorm with high winds turned us back. At first I wondered if this bike would seduce me away from the KLR but, as the miles flew past that thought just faded away.
The Discount Stripper was a good bike. Her overall performance was fine, and I have no complaints about acceleration, power or shifting. The bad tires and too low seat could easily be corrected. I had a fun couple of days riding this Discount Stripper. But when we parted, I was firmly committed to my KLR and eager to ride my bike when I returned home.
Sego Canyon Adventure
Most travelers speeding east-west on I-70 through Grand County, Utah probably do not notice the small town of Thompson as they pass. Aside from the gas station, Thompson has little to attract passersby, but just north of town is Sego Canyon which is worth a second look.

Your adventure begins at Exit-187 on I-70. After leaving the interstate, turn north or Highway 94 toward the gas station that comes before you enter Thompson Springs.
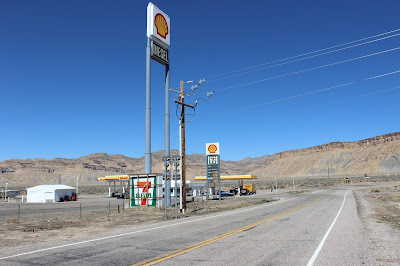
You may want to fill your gas tank, get a snack or take care of other "personal business" at the Shell/7-Eleven convenience store before heading into the back country.

Just follow your nose straight on through the quiet (deserted) town of Thompson Springs. They do have some railroad tracks you may want pause and look both ways prior to crossing. Follow Highway 94 through Thompson and soon you'll see the signs to Thompson and Sego Canyons.

The winding road through Sego Canyon goes from rough pavement, to rock strewn gravel with areas of sand. At first the road is suitable for a car, but becomes a narrow, rough Jeep trail that provides a fun ride between sandstone cliffs, tall pines, and high desert landscapes. Overall, the trail is not difficult or technically challenging on a motorcycle.


The art above is credited to the Archaic people who lived in this area from 8,000 to 2,000 years ago, Experts claim these people were nomads who did not build permanent structures, but lived in caves or temporary structures. All that remains of their passing are these paintings.

These images are Barrier Canyon Style, which consists of larger than life manlike forms painted with no eyes or hollowed eyes and often no arms or legs. Over the centuries the Anasazi, Fremont, and Ute tribes also left their mark near here.

The ghost town of Sego, began as a small mining operation in the early 1890s when rancher Harry Ballard discovered coal and bought the land. By 1911 he sold the mine to a group of Salt Lake City investors who expanded the operation. The remnants of a railroad they built to haul coal is still visible in the canyon.

The old company store is missing its roof and main floor, but the floor supports still protrude though the exterior stone walls. Decades later, the stone work on the building remains remarkably solid.

At one point Sego boasted a store, a boarding house and numerous homes for miners, But, by the late 1940s, low profits and financial problems caused the mine to close and the town was eventually abandoned.


Aside from the ghost town and Native American art, the natural beauty of Sego Canyon is worth taking time to admire. I spent several hours enjoying the sights and sounds of the canyon and did not see another person the entire time I was there.


Your adventure begins at Exit-187 on I-70. After leaving the interstate, turn north or Highway 94 toward the gas station that comes before you enter Thompson Springs.
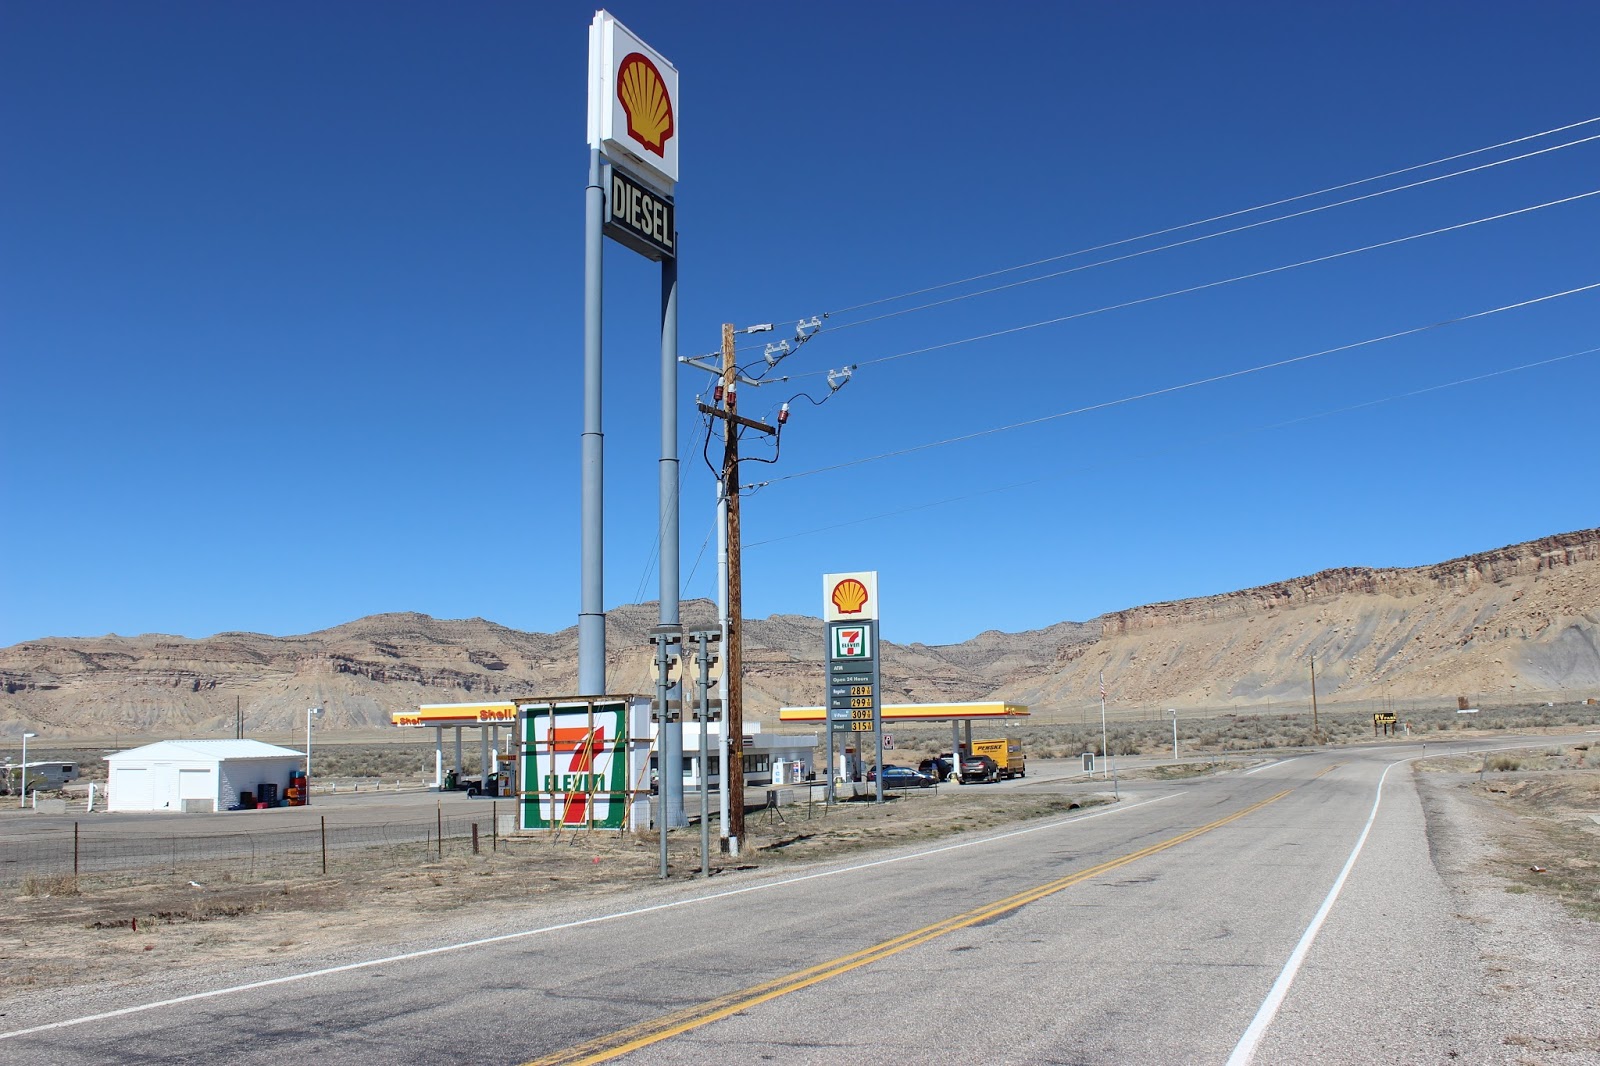


The winding road through Sego Canyon goes from rough pavement, to rock strewn gravel with areas of sand. At first the road is suitable for a car, but becomes a narrow, rough Jeep trail that provides a fun ride between sandstone cliffs, tall pines, and high desert landscapes. Overall, the trail is not difficult or technically challenging on a motorcycle.

The sandstone walls near the mouth of the canyon display ancient art from three different Native American cultures, of three separate eras. This site is listed on the National Register of Historic Places, but sadly vandals have defaced many of the painted and carved images.


The ghost town of Sego, began as a small mining operation in the early 1890s when rancher Harry Ballard discovered coal and bought the land. By 1911 he sold the mine to a group of Salt Lake City investors who expanded the operation. The remnants of a railroad they built to haul coal is still visible in the canyon.

The old company store is missing its roof and main floor, but the floor supports still protrude though the exterior stone walls. Decades later, the stone work on the building remains remarkably solid.


Since it is a ghost town, there has to be a ghost car. This battered, rusted, shell looked sadly at home resting beside a collapsed pile of dried out, splintered lumber that may have once been a home.


Aside from the ghost town and Native American art, the natural beauty of Sego Canyon is worth taking time to admire. I spent several hours enjoying the sights and sounds of the canyon and did not see another person the entire time I was there.

I would liked to have stayed longer, but approaching darkness and some threatening storm clouds convinced me to head back to the highway. Sego Canyon was a grat ride, with some interesting sites, as well. Next time you are in the area, I recommend you stop and see for yourself.
Subscribe to:
Posts (Atom)